Scanning Photographs for Preservation
Overview (Feb. '98, revised March '98, November 2007, August 2011)
For starters and if possible, when scanning faded photographs for preservation, I suggest scanning snapshots at 300 dots per inch (dpi). If you have a slide scanner, scan negatives or slides at at least 3000 dpi (at least 2400 dpi if you know the pictures are not the sharpest you have seen). However do not exceed the scanner's optical resolution, all that does is consume more disk space.
All photographs fade with age, some faster than others. If you have some faded photographs, your only hope for preserving the images for future generations might be scanning them and then enhancing the scans using computer software.
A typical good snapshot can have up to about 200 "TV lines of resolution per inch", abbreviated "lpi" in this discussion. (Two TV lines equal one photographic line also called a line pair.) You can expect 35mm slides or negatives to range from 1200 lpi (enough for 300 lpi when enlarged to a 4 x 6 inch print size) using an inexpensive zoom camera up to around 2400 lpi when taken with a good non-professional camera.
Go to web site table of contents
Lines Per Inch (lpi)
By "having, say, 200 lpi" we mean a photograph whose subject matter contains some closely juxtaposed details as small as, say, 1/200 inch. One thin line 1/200 inch wide in the middle of a patch of solid color does not need 200 dpi worth of scanner resolution to be picked up. But when three or more fine details are next to each other, finer scanner resolution is needed.
Why scan a 200 lpi photograph at 300 dpi? Or a 1600 lpi slide with 2400 dpi?
1. To overcome the pixel straddling effect (Kell Factor and Extended Kell Factor).2. To save time over examining each picture to decide what resolution to scan it at.
3. So all the scans will be the same size.
4. To reduce moire patterns.
Details will follow.
Reasons for preserving photographs with lower resolution scans only.
1. You have reached the maximum capability of your present scanner and computer.2. You need to conserve disk space.
3. The sooner the fading photographs are scanned the better.
4. You absolutely don't care about some of those details in the background.
4a. The pictures will never be seen except on a computer monitor
Other Comments
1. There is no advantage in scanning color photographs at a resolution higher than the optical resolution.2. If the original photograph is faded, set the black and white points to the white side of the range, if possible.
3. The rules here apply to scanning photographs for archival purposes. Different rules apply to web pages or desktop publishing.
Details, details ...
Why scan a 200 lpi (200 TV lines or 100 photographic line pairs per inch) photograph at 300 dpi (multiply by one and a half)? Or why scan a 1600 lpi slide with 2400 dpi?
1. To overcome the pixel straddling effect.
I put this one first because it is not well understood and is also the most important. Let's imagine that you have a picture whose resolution you are sure of. For example there is a picket fence far off in the background. If you just match that resolution when you scan and the scanner dot sensors happen to each exactly straddle a fence picket and the empty space between pickets, you get a total blur. Television and video experts state that the resolution of the scanned image is about 0.7 (a Kell factor) times the number of pixels or dots per inch. If your photograph had 200 lpi of resolution and you scanned it at 200 dpi, the scan would actually have 140 lpi of resolution. You need 200 divided by 0.7, or 286 (round up, to 300) dpi worth of scanner capability to preserve 200 lpi of picture resolution. When someone tells you your negative has "only" 1200 lpi, you should immediately think in terms of 1800 dpi (times one and a half) to scan it. More scientifically minded folks may contend that you need twice the number of pixels to capture a given number of lines of resolution and in a sense they are correct. But the improvement over scanning using one and a half as many pixels would be hard to see, even with a magnifying glass or a lot of zoom on the screen.
Where you might notice a difference is in small text. The strokes making up the characters are uneven in width or contrast when the scanning resolution is not quite large enough. By increasing the resolution you don't necessary get sharper crisper results but you do gain uniform stroke widths.
2. To save time over deciding what resolution to scan each picture at.
Not every picture will have subject matter with fine detail. But in order to find out which ones do, you just have to spend time examining them before scanning. I would err on the high side, setting the scanner once for the highest resolution of any of my pictures, and then scan them in quickly.
3. So all the scanned images will be the same size.
Images scanned at different resolutions appear on the screen in different sizes relative to one another. Scanning a group of pictures using the same resolution is just a question of convenience. If you scanned in some of your negatives at different resolutions, you would have to keep changing the zoom in Photoshop or whatever software you are using to view the images in the same size relative to each other.
4. To reduce moire patterns
Newspaper and magazine photographs are composed of tiny dots with gaps in between. Moire patterns may appear in the scanned images. This is due to the pixel straddling effect where the straddling by the scanner sensor goes in and out of phase with the dots on the paper. Moire patterns are usually reduced by scanning at or over twice the dot spacing of the original. It is harder for editing software to get rid of moire patterns that occurred during scanning than it is to shrink a larger higher resolution scan back to the desired size. Some brands of editing software will re-introduce moire patterns when the image is shrunk although you have a choice of zoom ratios some of which will produce less objectional moire patterns.
Reasons for choosing lower resolution to preserve photographs
1. You are already using the scanner's and/or computer's maximum capabilities.
If your scanner only has 600 dpi of optical resolution, that is the maximum you can choose. When the PC does not have enough memory, it has to store the data on the hard drive in temporary locations and has to continually move the data between memory and the hard drive. This makes editing, or even viewing, the file tedious and time consuming. Without enough memory, some PC's and their software won't complete the scan or won't succeed in putting the image on the screen when they display "fatal error" or other messages.
2. To conserve disk space.
If you scanned in a slide in 24 bit color (most common) and 2400 by 3600 dots (about 2400 dpi), the data file produced would be 26 megabytes in size. Whereas if you scanned it in at 1200 by 1800 dots, the data file would be 6 and a half megabytes. You must decide whether preserving every last bit of detail is worth the space the data consumes. (File sizes will be somewhat smaller if in the JPG format which has slight loss in quality. There may be a selectable quality setting where the better the quality the larger the file size.)
3. It is better to copy fading snapshots as quickly as possible.
Something is better than nothing. If you wait years and forget about it, the photographs may have faded more. Therefore if you are copying old fading photographs for archiving or preservation, do the best you can now. If and when you do get a better scanner, scan the pictures again.
4. You absolutely don't care about some of the details in the background.
If, after carefully examining the entire photograph, you decide you don't need to preserve all of the detail, it is acceptable to choose a lower resolution to scan at. Sometimes this is artistically desirable, as in de-emphasizing objects in the background by blurring them. But unlike depth of field when it comes to focusing a lens, capturing less detail during scanning affects the foreground also. And yes it is possible that years later your grandchild might want to see grand aunt Priscilla's false eyelashes or the tattoo on grand uncle George's arm.
4a. The picture will never be viewed except on a computer monitor.
The typical PC is set up to display a picture about 1000 pixels wide.. For normal web pages such as Facebook or eBay, pictures generally occupy half the screen width give or take, a 4 x 6 inch snapshot needs only about 100 dpi scan. If you are using a slide scanner, a 35mm slide or negative needs just 400 dpi. An original slide or negative 1-1/2 inches wide then produces a 600 pixel wide image. If you scan at a higher resolution and later shrink the image to better fit the screen, the computer simply discards pixels needed. Today's "digital picture frames" offer about 1000 pixels give or take across their width. If the scanner does not have the exact resolution setting to give you a picture of exactly the desired size, choose a higher resolution.
Other Comments
1. Avoid scanning photographs at more than the optical resolution of the scanner.
This calls the scanner interpolation process (if the scanner has one) into play. Interpolation during scanning does not improve color photograph scans but does increase the disk space the image data files take up.
Interpolation is used to insert extra pixels between the optically scanned pixels when you want a larger physical image size then the optically scanned pixels at so many per inch can give. Interpolation by definition is guesswork although it is "educated guessing" as to what colors the inserted pixels should be. Interpolation can occur during scanning, later during printing, or both, depending on the parameters you choose for your scan. During printing, interpolation is done automatically by the printer software when the image size is greater than a one for one match between the scanned pixels and the printer's pixels. A 4 x 6 inch snapshot scanned at 200 dpi would produce a picture just under 1-1/2 inches wide (1200 pixels) on a 720 dpi printer using the maximum size possible before printer software interpolation kicked in.
(Interpolation is supposed to be used when digitally reproducing black ink on white paper line drawings or blueprints, referred to categorically as line art. It reduces the "jaggies". Interpolation is also done automatically when you need to enlarge the picture using the computer to get a print of the desired size. You would save the original picture file and discard the file with interpolation for the enlarged picture when you were done printing.)
Reference: What does interpolation do? (http://www.scantips.com)
2. If the original photograph is faded, set the black and white points more to the white side of the range if possible.
This is usually done using a histogram tool or application furnished with the scanner software. When you move the "black point" to be lighter, you tell the scanner to treat things that are fairly light as black and give more contrast among the shades of color that still exist on the film, all of which are quite light.
Reference: A simple way to get better scans (http://www.scantips.com)
3. More references on scanning.
(further on down this page)
Some Sample Scans
I have done some tests with slightly above average snapshots and a Rand McNally road atlas where 300 dpi scans were superior to 200 dpi scans but 600 dpi scans looked the same as 300 dpi scans. The 600 dpi scan picked up some fine details on a postage stamp and some fine printed words on a dollar bill that the 300 dpi scan missed and that are almost invisible to the naked eye.
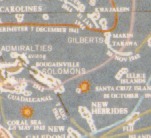
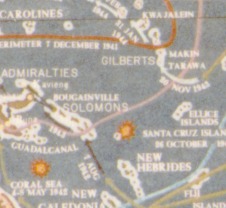
The following excerpts are from a color print from an ordinary photofinisher. Its negative was taken using an Olympus XA (above average point and shoot 35mm film camera, predecessor to the Stylus). The subject was a map at the Arizona Memorial in Pearl Harbor (Honolulu). In my opinion the 300 dpi scan (bottom) reproduces more detail than the 200 dpi scan (top).


In Wayne Fulton's "What do we achieve by scanning color prints over 200 dpi?" (revised, and renamed "On scanning color prints over 300 dpi") I thought that the thermometer in the 300 dpi scan looked better than it did in the 200 dpi scan. I believe the Kell factor accounts for the difference here. (To me the 400 dpi scan did not look better than the 300 dpi scan.)
(Reference: http://www.scantips.com as of 1998)
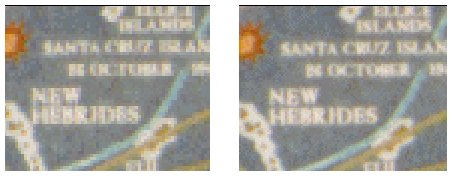
If you are making test scans, it is suggested that you magnify (zoom) each image to be the same size relative to each other when doing A-B comparisons.

On the left is a portion of the 200 dpi scanned image after triple zoom by the computer software. On the right is the same portion of the 300 dpi scanned image at double zoom so as to show the material on the screen at the same physical size. The intent was to do pure magnification without "resampling" although JPEG compression loss makes these sample enlargements look as if some resampling took place.
Some other experts and their opinions (as of mid-1998):
Philip Greenspun, who has published many articles on photography including building web pages and scanning photographs:(http://www.photo.net/philg/how-to-scan-photos.html)
Wayne Fulton, who has published an excellent series on scanning:
"When we get right down to it, color prints don't have more resolution than about 200 dpi ..." (www.scantips.com)
Doug Gennetten, engineer with Hewlett Packard
(below quoted from Wayne Fulton's Basics, Part 8, http://www.scantips.com)
From: <douglas_gennetten@hp.com>
Newsgroups: alt.comp.periphs.scanner,
comp.graphics.apps.photoshop,
comp.periphs.printer,
comp.periphs.scanners,
comp.sys.mac.graphics
Subject: RE: Scanning resolution? for best output on Epson 600
Date: Fri, 02 May 1997 13:24:43 -0600
Organization: Hewlett Packard
Message-ID: <336A3F7B.508A@HP.com>
NNTP-Posting-Host: slowpike.gr.hp.com"Since printers are at or near photo quality, scanning resolution is no longer a printer-dependent value. To get photo-quality scans---even if going to a 2450 dpi image setter -- 200 dpi is the max resolution you need if your original is a normal silver halide color print."
This page contains numerous links to other web sites. We cannot guarantee that the web pages linked to will continue to be available or accessible.
All parts (c) Copyright 1998-2011, Allan W. Jayne, Jr. unless otherwise noted or other origin stated.
If you would like to contribute an idea for our web page, please send us an e-mail. Sorry, but due to the volume of e-mail we cannot reply personally to all inquiries.